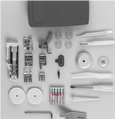
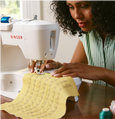
The Quarter Inch Piecing Presser Foot is used for quilting ¼” seam allowances, a must-have for piecing quilt tops! It can be used for small projects with narrow seam allowances like baby clothes and doll clothes. The red guide lines on the foot help you master perfect corners! Use only a straight stitch with this presser foot and make sure to turn the hand wheel toward you prior to sewing to ensure that the needle clears the foot’s opening.
Instructions
Be sure your sewing machine is set to straight stitch, center needle position. Turn the handwheel toward you slowly and check to see that the needle clears the small opening in the foot. If it does not clear the small opening, use the stitch width control to move the needle until it lines up with the hole of the foot without hitting the foot. Place your fabric under the presser foot and align the raw edge of the fabric with the right hand side of the presser foot for an accurate 1/4 inch seamline. As you begin sewing, hold the thread tails at the back of the foot to keep them secure and prevent thread tangling.
Pivoting
The foot has horizontal markings for multi-purpose uses in sewing. The horizontal marking closest to the front is a 1/4 inch guide useful when pivoting at a seamline corner with a 1/4 inch seam allowance. To pivot using the guideline at the front, sew your seam up to the corner, but stopping when the edge of the fabric aligns with the 1/4 inch horizontal guideline. Then, put the needle down in the fabric. With the needle down in the fabric, raise the presser foot, turn the fabric to sew the remainder of the seam, aligning the raw edge of the fabric with the righthand edge of the presser foot. Lower the presser foot then continue sewing a 1/4 inch seam. The remaining two horizontal markings can also be used for pivoting. The center horizontal mark is used for a 3/8 inch seam and the horizontal mark closest to the needle opening is used for a 1/2 inch seam.
