PFAFF® admire™ air 5000 Embellishment Feet Kit
Expand The Embellishment Capabilities On Your Admire™ Air 5000
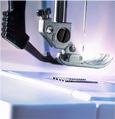
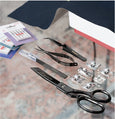
Kit is designed for the PFAFF® admire™ air 5000 overlock machine and includes 6 accessories, perfect for embellishment, garment sewing, home furnishings and more.
How To Use:
Cording Foot (Type A):
Use this foot with clear monofilament and other fine threads to reinforce fabric edges on tablecloths and other home decor items. Fishing line can even be used to create an attractive curling effect on light to medium weight fabrics.
1. Set the machine for ordinary 1-needle, 3-thread rolled hemming (using the right needle).
2. Remove the left needle and the presser foot.
3. Insert the cord into the guide on the Cording Foot. Attach the Cording Foot to the machine and pull the cord behind the foot.
4. Insert the fabric just in front of the upper knife. Sew the fabric, guiding the cord close to the right of the needle foot in place
Cording Foot (Type B):
Use this foot with cord or yarn to reinforce the edge of knit fabrics or prevent stretching. This also creates a padded edge, adding shape and strength to home decor projects and garments.
To Create Padded Edges
1. Replace the foot with the Cording Foot.
2. Set the machine for 1-needle 3-thread wide rolled hemming (using the left needle).
3. Set the lower knife in its rightmost position by turning the cutting width adjusting dial.
4. Raise the foot and insert the cord into the cord guiding hole and cord groove. Pull the cord behind the foot.
5. Place the fabric on top of the cord just in front of the upper knife. Make sure that the cord is aligned with the indicator line and start sewing slowly.
To Prevent Knits From Stretching
1. Replace the foot with the Cording Foot.
2. Set the machine for ordinary 2-needle 4-thread serging or 1-needle 3-thread serging (using the right needle).
3. Raise the foot and insert the cord into the cord guiding hole and cord groove. Pull the cord behind the foot.
4. Place the fabric under the cord and lower the foot. Make sure that the cord is aligned with the indicator line and start sewing.
Piping Foot 1/8" & 3/16"
Piping creates a professional finish and provides extra durability to projects. The groove in the Piping Foot firmly holds the piping in place so that it moves evenly under the foot to create a neat hem. For sewing:
1. Replace the foot with the Piping Foot.
2. Cut off a 2 to 3 centimeter section of the piping tape (do not cut into the cording section of the tape).
3. Place the piping tape between 2 pieces of fabric with right sides together.
4. Slide the fabrics forward until they touch the upper knife.
5. Lower the foot, making sure the piping cord fits into the guide groove underneath the Piping Foot.
6. Start sewing, guiding the piping cord under the groove.
Hints & Tips:
To sew sharp curves, snip several spots on the tape (do not cut into the cording section of the tape). Test sew on a scrap piece of fabric that you wish to use.
To attach piping to heavy fabric, baste the edge of the piping tape onto the fabric. For fine fabric, you can use light craft glue to hold the piping tap in place.
Beading Foot & Guide
1. Embellish any project by attaching a string of 1 - 4mm size beads to the edge of fabric. To set up the machine:
2. Set the machine for 1-needle 3-thread wide rolled hemming *using the left needle).
3. Replace the foot with the Beading Foot.
4. Open the side cover and the looper cover.
5. Deactivate the upper knife.
6. Set the needle plate setting knob to R position.
7. Loosen the attaching screw and slide the Beading Guide onto the attaching screw from the right to the left. (Before using your Beading Guide, loosen setscrews on the attachment plate. Slide the Beading Guide toward the Beading Foot and tighten the setscrews.)
8. Tighten the attaching screw.
9. Close the side cover and the looper cover.
Sewing with the Beading Foot:
1. Raise the Beading Foot, place the beads in the groove of the attachment and pull the beads under the groove of the foot to the back side of the foot.
2. Lower the foot and sew 2 to 3 stitches to hold the beads.
3. Fold the fabric in two with the wrong sides together.
4. Raise the foot again and place the folded fabric next to the beads.
5. Loosen the attaching screw and adjust the Beading Guide so the needle pierces the folded fabric 1.0 to 1.5mm inside the edge.
6. Tighten the attaching screw, lower the foot and sew.
Note: If the beads are not feeding evenly, guide the beads by hand. Adjust stitch length so that 1 bead is caught by 1 stitch.


