Singer Machine FAQs: Helpful Tips and Troubleshooting Guide
Whether you're a seasoned sewer or a beginner, keeping your Singer® sewing machine in top working condition is essential for seamless stitching. Below are some helpful tips and solutions to common issues, along with internal linking opportunities to enhance your experience.
Basic Sewing Tips for Every User
Turn the Handwheel Correctly:
Always turn the handwheel towards you (counterclockwise). Turning it in the opposite direction can disrupt your machine's timing, requiring a visit to a service center. For more information on timing issues, see our Singer machine service guide.
Presser Foot Position:
Always ensure the presser foot is in the down position before sewing. Sewing with it in the up position may lead to thread tangles and bobbin jams. Learn more about adjusting the presser foot.
Needle Care:
Change your needle regularly—ideally after every 6 to 8 hours of use. A dull needle can damage your fabric and the machine. Be sure to use only SINGER needles to maintain optimal performance. Explore our needle selection guide.
Using the Correct Bobbin:
Ensure you're using the correct bobbin for your machine. While Class 66, Class 15, and Class 15J bobbins may look similar, using the wrong type can damage your machine. For more on choosing the right bobbin, check out our bobbins guide.
Singer Machine FAQs: Helpful Tips and Troubleshooting Guide
Why is My Electronic Machine Beeping and Not Sewing?
Possible Issue: You may have accidentally lowered the buttonhole lever next to the needle bar.
Solution: Gently lift the buttonhole lever and ensure the needle is at its highest position. Turn the handwheel towards you to raise it if needed. Finally, push the reverse button a couple of times to reset the machine. If the problem persists, you may need to visit a Singer service center for assistance.
How Do I Sew Denim and Heavy Fabrics?
For Denim: Use a SINGER Denim Style 2026 needle and set the machine for a straight stitch. Adjust the stitch length between 4 and 5 to accommodate the fabric’s thickness. Use the metal all-purpose foot originally attached to your machine for best results. For topstitching, use topstitching thread in the upper tension and regular thread in the bobbin.
For Other Heavy Fabrics: Use a size 16 or 18 SINGER® needle. Set the machine to a straight stitch with the length set between 3 and 4. Always sew at a moderate speed, especially when working over thick seams. Need more guidance on sewing heavy fabrics? Visit our fabric guide.
Why Won’t My Machine Pick Up the Bobbin Thread?
Check the Bobbin Winding Spindle: Ensure it’s pushed back to the left for sewing.
Needle Placement: Ensure the needle is correctly installed with the flat side facing back.
Threading Issues: Make sure the upper tension disks are threaded properly and the presser foot is raised while threading.
Drawing Up the Bobbin Thread: Hold the needle thread lightly and turn the handwheel towards you. Once the needle moves down and up, a loop of the bobbin thread should appear. Pull both threads under the foot. If these steps don’t solve the issue, it may be a timing problem that requires a service visit.
Why is My Machine Skipping Stitches?
Skipped stitches often point to either a needle issue or timing disruption.
Needle Check: Replace the needle if it’s damaged or dull. For knits or synthetics, use a ballpoint needle.
Needle Insertion: Ensure the ne
edle is fully inserted with the flat side facing the back.
If the problem persists, it could be a timing issue—visit a Singer® service center for repairs.
Why is the Thread Looping or Bunching Under My Fabric?
Thread looping underneath the fabric often occurs when the upper tension is incorrect.
Correct Threading: With the presser foot up, follow the threading guide, ensuring the thread is positioned properly in the tension discs.
Test the Threading: Before threading the needle, pull the thread—if it’s too loose, re-thread the machine. For further troubleshooting, see our thread tension guide.
Why is the Thread Looping on Top of My Fabric?
Bobbin Insertion: Ensure the bobbin is correctly inserted. Refer to our illustrated guide for bobbin insertion for more details.
Bobbin Tension: The bobbin tension is typically pre-set and should not require adjustment. If issues persist, adjust the screw in small increments.
Why Doesn’t My Stitch Pattern Match What is On the Machine?
Stitch patterns often require specific stitch length settings to achieve the desired effect.
For decorative stitches (such as a crescent or bead stitch), set the stitch length to between 0.5 and 1.5 for the best results.
If using stretch stitches, set the stitch length to the “S” (Stretch) setting.
Adjusting the stitch width also impacts the appearance of the stitch. Refer to your machine’s manual for specific recommendations.
How Often Should I Oil My Machine?
When to Oil: If your manual does not mention oiling, your machine has been pre-lubricated and requires no additional oiling. For regular use, apply 2 to 3 drops of oil in the bobbin case and needle bar area once every month, or more often if you sew daily.
Service Tip: Have your machine tuned up by a qualified Singer® technician every 3 to 4 years to ensure it runs smoothly.
What Types of Thread Should I Use?
For most household sewing machines, all-purpose polyester thread works well for most fabrics. If you are quilting, opt for cotton thread. Heavy-duty threads can be used occasionally, but they may cause tension issues if used regularly.
For more on choosing thread, see our thread guide.
I Can’t See the Take-Up Lever—What Do I Do?
The take-up lever is hidden behind the front panel of your machine.
Ensure the needle is in its highest position. Pull the thread down behind the lever and guide it through the take-up lever opening.
Need More Help?
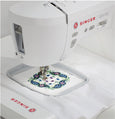
For embroidery machine troubleshooting, visit our Futura Support page.
For further assistance, you can always visit a Singer® Service Center.
