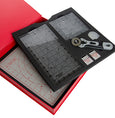
HUSQVARNA® VIKING® Quilt Binder for IDF System

sku 920507096
Up to 20% Off
$199.95 MSRP

Free Shipping on Machines and orders over $35 (Excludes AK & HI) Free returns through January 2025.

Use the Quilt Binder to more quickly and evenly attach binding to your quilt projects. Its design accommodates the quilt layers and creates a 1/2" wide finished binding.
Details

The Double Fold 1/2" Quilt Binder will turn a lightweight woven fabric strip into a binding and attach it to the project edges all in one step when fitted with 412964206 or 412964207 stitch plate. To bind edges with the Quilt Binder, cut a 1 3/4" (45 mm) wide strip of lightweight woven fabric.


Compatible with HUSQVARNA® VIKING® machine model groups: 8, 9*.

  • DESIGNER DIAMOND™ series
  • DESIGNER RUBY™ series
  • DESIGNER TOPAZ™ series
  • SAPPHIRE™ series
  • OPAL™ series
  • EDEN ROSE™ 250C
  • BRILLIANCE™ series
  • TRIBUTE™ 140C, 145C
  • DESIGNER SAPPHIRE™ 85


*When used with Quilt Binder Foot for IDF Systems (920568096)

Additional Features
  • Opening easily accommodates quilt layers
  • Quickly creates and attaches a finished 1/2" binding
Specifications

How to Use:

  1. Attach the Interchangeable Dual Feed foot or attach the Quilt Binder Foot for IDF System
  2. Set the machine for straight stitch or hand look quilt stitch.
  3. Place the attachment plate on the stitch plate of the machine. Align pin on the back of attachment plate to the top opening on the stitch plate of the machine. Screw the attachment plate in place with one thumb screw.
  4. Place the binder on the attachment plate and adjust the binder to line up. Attach the binder in place with the new thumb screws and washers.
  5. Measure the length of your project and add at least 6" (15cm).
  6. Cut enough 1 3/4" (45 mm) strips to equal that number and join the strips together. Cut the end of the strip into a point.
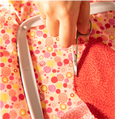
  7. Using tweezers, slide the fabric strip into the binder with the wrong side facing you.
  8. When the fabric is through the end of the binder, hold the folded strip with your left hand and continue to feed it into the binder while the fabric forms a double-fold tape.
  9. Raise the presser foot and pull the strip under the foot and straight back 2.5" (5-6cm) behind the needle.
  10. Slide the fabric to be bound right side up into the slot of the binder. Adjust the stitch position to right or left to reach the desired needle position.

How to end the binding:

  1. Sew the binding all the way around the quilt edges. When the edges of the binding almost meet, cut the excess of fabric in beginning of binding.
  2. Continue to sew, overlapping the binding one more time. Remove the Quilt from the binder and trim excess, leaving 1" (2.5cm) tail. Fold back the opening and pin in place. Sew a seam over the folded edge.

Machine Compatibility