PFAFF® Overlock Feet Kit
You may also need
Extend The Capabilities Of Your Overlock
Expand the capabilities of your PFAFF admire™ air 7000 Overlock Machine with the overlock feet kit.
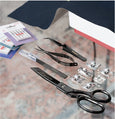
Includes 5 presser feet:
Gather fabric with ease using the Gathering Foot
Add elastic to garments and control the amount of stretch with the Elastic Foot
Sew invisible hems or apply lace with the Blind Hem & Lace Foot
Create and insert piping into home dec projects effortlessly with the Piping Foot
Stabilize and prevent seams from stretching with the Taping Foot
Gathering Foot
Recommended stitches: 4-thread overlock, 3-thread overlock wide.
Settings: Use default settings in Owner's Manual for stitch length, cutting width and presser foot pressure. Set differential feed to 1.5 - 2.0.
1. Set the overlock machine for the desired stitch.
2. Snap on the Gathering Foot.
3. Insert the bottom fabric layer (fabric to be gathered) between the needle plate and the Gathering Foot all the way up to the cutter, with right side up.
4. Insert the top fabric layer right side down into the opening of the Gathering Foot and even with the bottom layer.
5. Lower the presser foot and sew. Guide the fabric against the fabric guide, letting the bottom layer feed freely to gather.
Note: A single layer of fabric may also be gathered by placing it under the foot and adjusting the stitch length, differential feed and needle tension to the desired fullness. To increase fullness of gathers, increase the needle thread tension, set the differential feed to a higher number, and adjust the stitch length to a higher number.
Elastic Foot
Recommended stitches: 4-thread overlock, 3-thread overlock narrow.
Settings: Use default settings (see Owner's Manual).
1. Set the overlock machine for the desired stitch.
2. Loosen the screw at the front of the Elastic Foot to release the tension on the roller. Insert the elastic into the foot.
3.Snap on the foot and pull the elastic until it reaches behind the foot.
4. Tighten the tension screw to stretch the elastic.
5. Turn the handwheel to sew the first few stitches to secure the elastic.
6. Place the fabric under the foot and sew both the elastic and the fabric together.
7. Check the stitch and adjust the tension if necessary.
Note: To adjust the stretch of the elastic, turn the extension screw to the right for more stretch, turn the screw to the left for less stretch, and be careful not to stretch the fabric while sewing.
Piping Foot
Recommended stitches: 4-thread overlock, 3-thread overlock wide.
To Stitch Piping Into a Seam
1. Place the piping along the seam on the right side of the fabric. Place second piece of fabric on top with right sides together.
2. Put fabric and piping layers under the piping foot with the piping in the groove on the underside of the foot.
3. Sew piping into the seam.
4. The groove on the underside of the foot will guide the piping as you sew.
To Make Piping From Your Fabric
1. Cut bias or crosswise grain strips wide enough to cover the cord plus the seam allowances.
2. Lay the cord on the wrong side of the fabric strip and fold the fabric over the cord.
3. Place the fabric and cord under the piping foot with the cord in the groove on the underside of the foot.
4. Sew. The groove on the underside of the foot will guide the piping as you sew.
Taping Foot (used to apply seam tapes to seams for extra reinforcement or to prevent stretching in 1 easy step)
Recommended stitch: 4-thread overlock.
Settings: Use default settings (see Owner's Manual).
1. Place the seam tape into the guides on the foot.
2. Snap the Taping Foot onto the machine.
3. Adjust the guide so the needle just catches the header of the lace.
4. Sew the seam.
Note: Works best with 1/4" (8mm) seam tape.
Blindhem & Lace Foot (hems are sewn, overcast and trimmed in one step)
Recommended stitches: 4-thread overlock, 3-thread overlock wide.
Settings: Use default settings (see Owner's Manual).
To Sew a Blindhem
1. Select desired stitch and snap on Blindhem Foot
2. Fold and press the hem in place. Turn the hem back on itself toward the right side of the fabric. Leave 1/4" (6mm) of the edge exposed.
3. Place the hem under the foot with the fold against the guide on the foot.
4. Loosen the guide screw to adjust the guide so the needle just catches the thread of the fold.
5. Guide the fabric as you sew, making sure the fold of the fabric is always against the guide.
6. Open the fabric and press lightly on the wrong side.
Note: Test on a scrap piece of fabric before sewing your project.
To Apply Lace
1. Select desired stitch and snap on Blindhem Foot
2. Place the wrong side of the lace to the right side of the fabric.
3. Place under the foot with the fabric extending to the right of the guide. The header of the lace will be against the left side of the guide.
4. Loosen the guide screw to adjust the guide so the needle just catches the header of the lace.
5. Guide the fabric as you sew, making sure the header of the lace is always against the guide.
6. When finished, open the lace flat, fold the seam allowance to the back of the fabric and press.
7. If using insertion lace, repeat on the other side of the lace.


